Water spreads quickly, seeps into hidden gaps, and can begin damaging finishes and framing almost immediately. The first day is critical: your choices in those hours can help prevent structural problems and mold, and make an insurance claim smoother. Whether a supply line burst, a washing machine overflowed, or a storm pushed water into your home, a simple, step-by-step approach will help you act with confidence. This guide covers immediate safety checks, documentation, smart drying tactics, and common mistakes to avoid, helping you stabilize the situation and protect your home’s health.
-
Stabilize the Situation Safely
Start by staying safe. If water is near outlets or appliances, turn off power to affected rooms at the breaker panel before you step in. Stop the source if you can do so without risk; close the main water shutoff for a burst pipe, or place a catch under a slow ceiling drip. If the water source is uncertain or the ceiling is sagging, keep people out of the area until it’s evaluated. For significant flooding, local professional teams offer rapid response; many homeowners seek out services such as emergency water cleanup in Vancouver during heavy rains and winter thaw events when basements and first floors are most vulnerable.
Next, size up the water category. Clean water from a supply line is less hazardous than “gray” water from appliances, while sewage-contaminated black water requires strict safety precautions and professional handling. Wear gloves and boots when entering wet areas. Keep kids and pets away. If you suspect contamination, avoid direct contact and ventilation that could aerosolize contaminants, and arrange qualified help promptly.
-
Document and Start the Paper Trail
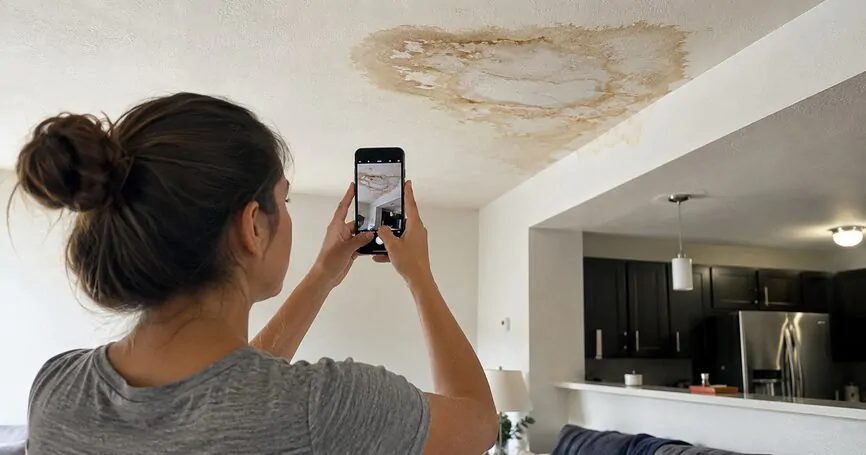
Even in an emergency, take a few minutes to document. Capture wide and close-up photos and short videos that show waterlines on walls, standing water depths, affected rooms, and any visible damage to furniture and electronics. Photograph the suspected source (for example, a split hose behind the washer). Create a quick inventory of damaged items, noting brand and model numbers when practical. This record helps insurers understand the scope and timing and supports decisions on replacement or restoration.
Call your insurance company to open a claim and ask about coverage, mitigation duties, and preferred documentation. Keep receipts for anything you buy or rent, such as fans, dehumidifiers, protective gear, or tarps, as these may be considered mitigation costs. Don’t discard damaged materials until an adjuster approves, unless they pose a safety risk; if removal is necessary, bag and label samples of carpet or pad to show later. Good records reduce back-and-forth and can speed up decisions about repairs.
-
Dry Out Strategically
Drying is a race against time. Within the first 24 to 48 hours, focus on airflow, dehumidification, and removing trapped moisture. If weather permits, open windows briefly to exchange humid indoor air with drier outdoor air, then close up and run dehumidifiers to pull moisture from the space. Position box fans to move air across wet surfaces, not directly into saturated drywall, where it can spread moisture deeper. Lift or remove area rugs and move furniture to dry zones. Pull off baseboards carefully to allow wall cavities to vent; label them for reinstallation.
Prioritize materials. Non-porous surfaces like tile, sealed wood, and metal can usually be cleaned and dried. Semi-porous materials, finished hardwood, and some laminates require attentive drying to prevent cupping or delamination. Porous materials such as carpet pad, insulation, and saturated drywall often need to be removed to prevent hidden moisture and mold growth. Be cautious about tear-out beyond surface finishes; avoid structural work until a qualified professional evaluates framing moisture with a meter. Don’t run your central HVAC through a heavily wet, contaminated area; it can spread moisture or pollutants unless a pro confirms it’s safe.
-
Prevent Mold and Secondary Damage
Mold can begin to colonize damp organic materials within a day or two in the right conditions. Keep indoor humidity as low as possible while drying; use multiple dehumidifiers in larger areas and empty reservoirs frequently. Disinfect hard surfaces with a household cleaner after the initial rinse to remove dirt and spores. Avoid using bleach on porous building materials it doesn’t penetrate well and can leave excess moisture behind. If you must handle wet, dirty debris, wear gloves, eye protection, and a respirator rated for particulates.
Seek out hidden moisture. Check under cabinets, behind toe-kicks, inside closets, and in adjacent rooms. Look below the affected floor for damp spots on ceilings or in crawlspaces and basements. Stains or bubbling paint can appear days later as water wicks through materials; keep monitoring. Use a basic pinless moisture meter, if available, to track progress and confirm that surfaces are trending dry before closing walls, reinstalling baseboards, or refinishing floors.
-
Common Mistakes to Avoid
Waiting is the most costly error. Start mitigation immediately once it’s safe, even if you’re still arranging professional help. Don’t use a household vacuum for water extraction; it’s unsafe and ineffective. Avoid turning on ceiling fixtures if the ceiling is wet; trapped water can short the wiring or cause the fixture to fall. Don’t paint over water stains or reinstall finishes until moisture levels are verified; trapped dampness encourages mold and can damage new materials.
Another frequent misstep is focusing only on what you can see. Water migrates behind baseboards, under sill plates, into insulation, and through floor seams. If flooring feels spongy or walls feel cooler to the touch than surrounding areas, moisture may be present. When in doubt, schedule an inspection that includes moisture mapping and a drying plan. Verification either through your own readings or a professional’s report provides confidence that the structure is dry and ready for repairs.
Acting quickly, documenting thoroughly, and drying methodically are the pillars of a successful first 24 hours after a water incident. Even a modest leak can cause outsized problems if moisture lingers in wall cavities, under flooring, or inside cabinets. With a safety-first mindset and a clear plan, you can limit damage, protect indoor air quality, and ensure repairs go smoothly. If conditions are beyond your tools or time, prioritizing prompt help and ongoing moisture checks will keep recovery on track.